Remote access to your Raspberry Pi is a powerful feature that allows you to manage and control your device from anywhere in the world, completely free of charge. Whether you're a hobbyist, developer, or simply someone who wants to expand the capabilities of your Raspberry Pi, learning how to set up a free remote login is essential. This guide will walk you through everything you need to know about accessing your Raspberry Pi remotely without spending a dime.
In today's digital age, the ability to control your devices remotely has become increasingly important. The Raspberry Pi, a versatile and affordable single-board computer, offers a wide range of possibilities for remote access. From monitoring security cameras to managing home automation systems, the applications are endless. By enabling free remote login to Raspberry Pi, you can take full advantage of its potential without any financial burden.
Before diving into the technical aspects, it's crucial to understand the importance of security and reliability when setting up remote access. This guide will ensure that you not only learn how to configure free remote login but also do so in a secure and efficient manner. Let's get started!
Read also:Trevor Donovan The Journey Of A Rising Hollywood Star
Why Free Remote Login to Raspberry Pi Matters
Free remote login to Raspberry Pi is more than just a convenient feature—it's a game-changer for users who want to maximize their device's functionality. With remote access, you can:
- Access your Raspberry Pi from anywhere in the world using just an internet connection.
- Streamline project management by controlling multiple Raspberry Pi devices simultaneously.
- Save money by avoiding expensive subscription services while still enjoying robust remote access features.
Whether you're running a server, hosting a website, or managing IoT devices, the ability to connect remotely can significantly enhance productivity. Moreover, free solutions eliminate the need for costly software or hardware upgrades, making it an attractive option for both beginners and professionals.
Prerequisites for Free Remote Login
Before setting up a free remote login to your Raspberry Pi, ensure that you meet the following prerequisites:
Hardware Requirements
- A Raspberry Pi device (any model with network capabilities).
- A stable internet connection for both the Raspberry Pi and your remote device.
- A keyboard, mouse, and monitor for initial setup (optional if using SSH).
Software Requirements
- Raspberry Pi OS installed on your device.
- A remote access client such as PuTTY (for Windows) or Terminal (for macOS/Linux).
- A dynamic DNS service account (optional but recommended for easier access).
Having these tools ready will make the setup process smoother and more efficient. Let's move on to the next step!
Setting Up SSH for Free Remote Login
SSH (Secure Shell) is one of the most popular methods for enabling remote login to Raspberry Pi. It provides a secure and encrypted connection, ensuring your data remains protected during transmission. Follow these steps to configure SSH:
Enabling SSH on Raspberry Pi
- Boot your Raspberry Pi and log in to the desktop environment.
- Open the terminal by clicking on the terminal icon or pressing Ctrl+Alt+T.
- Enter the following command to enable SSH:
sudo raspi-config. - Navigate to "Interfacing Options" and select "SSH".
- Choose "Yes" when prompted to enable SSH.
Once SSH is enabled, your Raspberry Pi will be ready to accept remote connections. Note that the default port for SSH is 22, so ensure this port is open on your router if you're accessing the device from outside your local network.
Read also:Colin Morgan The Versatile Talent Behind The Screen
Configuring Your Router for Port Forwarding
To access your Raspberry Pi from the internet, you'll need to configure port forwarding on your router. This process involves directing incoming traffic on a specific port to your Raspberry Pi's local IP address. Here's how to do it:
Steps for Port Forwarding
- Log in to your router's admin interface using its IP address (usually 192.168.0.1 or 192.168.1.1).
- Navigate to the "Port Forwarding" or "Virtual Servers" section.
- Create a new rule with the following settings:
- Service Port: 22 (SSH)
- Internal IP Address: Your Raspberry Pi's local IP address (e.g., 192.168.1.10)
- Protocol: TCP
- Save the changes and restart your router if necessary.
With port forwarding configured, your Raspberry Pi will be accessible from the internet. However, to simplify the connection process, consider setting up a dynamic DNS service.
Dynamic DNS for Easier Access
Dynamic DNS (DDNS) allows you to assign a memorable domain name to your Raspberry Pi's IP address, which can change frequently. This eliminates the need to remember complex IP addresses and makes remote access more convenient. Popular DDNS services include No-IP, DuckDNS, and Dynu.
Setting Up DuckDNS
- Visit the DuckDNS website and create a free account.
- Choose a domain name for your Raspberry Pi and note the token provided.
- Install the DuckDNS client on your Raspberry Pi by running the following commands in the terminal:
sudo apt update sudo apt install curl curl https://www.duckdns.org/install.sh | bash
- Follow the prompts to enter your domain name and token.
Once configured, your Raspberry Pi will automatically update its IP address with DuckDNS, ensuring seamless remote access.
Securing Your Remote Connection
Security is paramount when setting up a free remote login to Raspberry Pi. Follow these best practices to protect your device:
Change Default SSH Port
Changing the default SSH port from 22 to a non-standard port can deter automated attacks. To do this:
- Edit the SSH configuration file using the following command:
sudo nano /etc/ssh/sshd_config. - Locate the line that says
Port 22and change it to a different number (e.g., 2222). - Save the file and restart the SSH service:
sudo service ssh restart.
Use Strong Passwords or SSH Keys
Replace weak passwords with stronger ones or, better yet, use SSH keys for authentication. To generate an SSH key:
- Run the following command on your local machine:
ssh-keygen -t rsa. - Copy the public key to your Raspberry Pi:
ssh-copy-id pi@your-duckdns-domain. - Disable password authentication in the SSH configuration file to further enhance security.
Alternative Methods for Free Remote Login
While SSH is the most common method for remote access, there are other free options worth exploring:
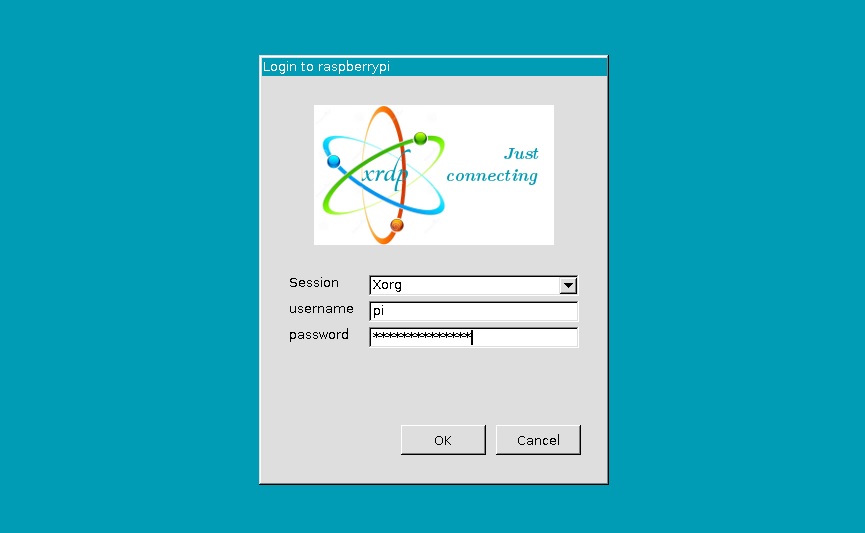
VNC (Virtual Network Computing)
VNC allows you to access the graphical desktop of your Raspberry Pi from a remote device. To set it up:
- Enable VNC in the Raspberry Pi Configuration tool.
- Install a VNC client on your remote device (e.g., RealVNC Viewer).
- Connect to your Raspberry Pi using its IP address or DDNS domain.
Web-Based Interfaces
Some applications, such as Pi-Hole and Home Assistant, offer web-based interfaces that can be accessed remotely. Ensure these interfaces are secured with strong passwords and HTTPS encryption.
Troubleshooting Common Issues
Despite careful setup, issues may arise when configuring free remote login to Raspberry Pi. Here are some common problems and their solutions:
Unable to Connect via SSH
- Verify that SSH is enabled on your Raspberry Pi.
- Check that port forwarding is correctly configured on your router.
- Ensure your Raspberry Pi's IP address matches the one specified in the port forwarding rule.
Slow Connection Speeds
- Optimize your network settings for better performance.
- Consider upgrading your internet plan if bandwidth is insufficient.
Best Practices for Efficient Remote Access
To make the most of your free remote login to Raspberry Pi, follow these best practices:
- Regularly update your Raspberry Pi OS and installed software to ensure security and stability.
- Monitor your device's resource usage to prevent overload during remote sessions.
- Document your setup process for future reference and troubleshooting.
Conclusion
Free remote login to Raspberry Pi opens up a world of possibilities for users who want to harness the full potential of their devices. By following the steps outlined in this guide, you can securely and efficiently access your Raspberry Pi from anywhere in the world without incurring any costs. Remember to prioritize security and reliability to protect your device and data.
We encourage you to share your experiences and ask questions in the comments section below. Additionally, explore other articles on our site for more tips and tricks on maximizing your Raspberry Pi's capabilities. Happy tinkering!
Table of Contents
- Why Free Remote Login to Raspberry Pi Matters
- Prerequisites for Free Remote Login
- Setting Up SSH for Free Remote Login
- Configuring Your Router for Port Forwarding
- Dynamic DNS for Easier Access
- Securing Your Remote Connection
- Alternative Methods for Free Remote Login
- Troubleshooting Common Issues
- Best Practices for Efficient Remote Access
- Conclusion